| PARTS IS PARTS | |
It took more time to come up with all the parts for this thing than it did to actually build it. Below is a listing in no good order of some of the parts I used and where they came from. There are many more parts that go into it but I won't bore you with all the nuts and bolts.
|
|
| The Monitor | |
Obviously one of the most important decisions and also the hardest. Without the proper monitor it just wouldn't have the right feel or even look right for that matter. One choice is a TV. A TV would have the right curve to the tube but I was worried about how good the picture quality would be not only for the games but for cruising around in Windows, so no TV. A genuine standard resolution arcade monitor would definitely display the correct resolution for almost all the games but again I was worried about the quality in Windows. A computer monitor would definitely be easy to use and look great in windows but the picture quality is actually too good for authentic game feel and even the monitors that aren't perfect flat still have a FST (flat square tube) which means they are flatter than a TV or arcade monitor and there would not be a monitor bezel I could buy to fit that curve very well. That doesn't leave any choices it seems? Well there is such a thing as VGA arcade monitor which is what I ended up with. I bought a Wells Gardner U3100 and run it at 800x600. It will not run the games at their native resolution but since it is not as high res as a computer monitor the games still look really close to authentic and since I am not an arcade game buff nor do I have a side by side comparison I cannot tell the difference. With the higher than TV and standard arcade monitor resolution it works well enough in Windows for what I am using it for. I don't recommend it for much else than the old arcade games though. Small text is not the easiest to read. The dot pitch just isn't fine enough and the resolution isn't good enough for the newer computer games. For me this wasn't an issue since I would only be using it for MAME and possibly some console emulators. If you are wondering why I wanted to use it with Windows and not just use DOS it is because with the higher end processors MAME runs better in a Windows environment. Here is a picture of the monitor after I got it to flip the screen upside down. This was necessary to have the bottom of the screen toward the front of the cabinet after mounting.
If you would like to know how I flipped the screen just send me an email. |
|
| The Computer | |
Since I wanted to be able to play fighting games like Mortal Kombat II at full speed and possibly some newer games I built a system from scratch using some pretty good parts: P4 2.6Ghz hyperthreading processor, Intel motherboard, Matrox G400 video, 80 gig Seagate hard drive, and 512MB dual channel DDR400 memory. Haven't played any games yet that peg the processor out. (Mortal Kombat on my office computer with a PIII 700Mhz processor ran very sluggish) I am running Windows 2000 now but will probably switch to XP to take full advantage of the hardware. The motherboard had decent onboard video but I wasn't able to use it with the U3100 monitor because I needed to be able to fine tune the Horizontal frequency because the U3100 can be very picky.
|
|
| Speaker/Vent Grilles | |
I got lucky on these. Found a guy online who had bought out a Radio Shack. Apparently Radio Shack used to sell the exact same Grilles that were the Midway cabinets. Only paid $5 a piece. I bought four for maximum ventillation and the guy only had five to sell. Here is a picture of the package:
|
|
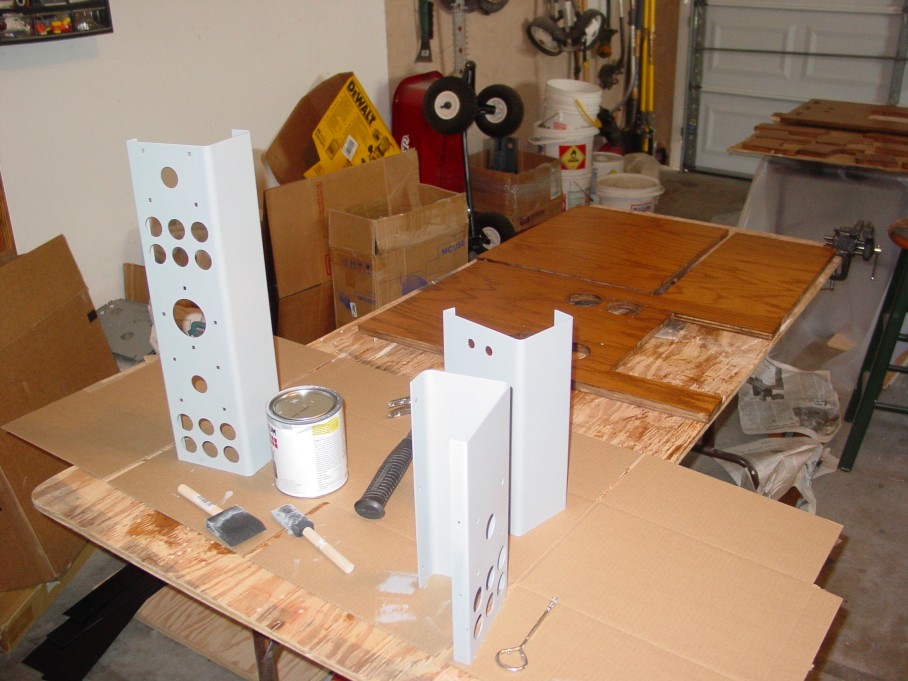
| Control Panels | |
Ended up having these made by a local metal shop since I wanted a third long control panel that nobody sold. I have been selling the extra ones on Ebay.
|
|
| White plexi windows | |
Got these from a local plastics shop. Again had to buy a bunch and am selling the extras as a package deal with the panels.
|
|
| Z brackets and glass clips | |
Got these from Mantis Amusements. They were the only place that I found that has the Z brackets to hold on the control panels.
|
|
| Coin Door, Joysticks, Buttons, Monitor Bezel, Panel Clamps, PCB mounting feet, Carriage bolts, Leg levellers, Trackball, etc | |
| Happ Controls. They got a bunch of stuff. | |
| Cabinet | |
Made it myself using mainly a Router with a pattern cutting bit. Got the 3/4 inch Oak veneer plywood from Home Depot along with some hardware. Got the 1 inch thick top plywood at the one and only local lumber place that carried it. It is definitely hard to find.
|
|
| Pac Man Graphics Underlay and Glass Top | |
| Got this at the only place I could find it. Two Bits. | |
| Keyboard Encoder | |
| The picture in the gallery shows everything hooked up to an IPAC from Ultimarc. I have hooked up the controls to a keyboard hack that worked well and is alot cheaper but when hooking up this many controls the IPAC is the way to go. The IPAC is great when you need an encoder that doesn't work on a matrix. |